Image Map
Showing posts with label Interactive Notebooks. Show all posts

Friday, August 12, 2016

A Test Strategy That Actually Grows Students As Readers

So often, teachers in testing grades come to a point in the year where they have to make the decision to spend valuable class time teaching students how to take a test or continue building their foundation as readers. Unfortunately, the two are very different. End of year state tests are not written in a way that allows students to pass simply because they can read, comprehend, and apply on grade level. Without some explicit teaching on testing strategies and preparation, students go in to testing environments with a disadvantage.

I teach third grade, the first year that students have to take an end of year reading test. It is nothing like they have seen before and they have a ton of questions about it, usually starting in August. I have always been, especially this past year, the “Fight the Man-I Hate Testing” teacher. In meetings, I have even responded to the question of who in my class I don’t think will pass with DRA scores and phenomenal reading growth I’ve seen. I hate thinking of my kids as a test score and focusing my instruction all year on them passing one test.


However, although I may be stubborn, I am not stupid. I know that my students will need explicit test direction in order to be successful and I really do want them to pass. This past year, my students did AMAZING on their end of year reading test. I had higher scores than ever before and I was blown away. This was definitely not the highest group I have ever had. So, like every teacher has been trained to do, I reflected. I thought about what I did differently this year that may have made a difference, and one thing stood out.

Note-Taking.

*side note: I also saw a jump in my scores the year I started teaching QAR, but more on that another day.

I have always taught my kids strategies for answering questions and a method to reading text, understanding questions, and finding evidence. However, this was the first year I required students to take notes before answering any questions. This was a strategy I poured a lot of time into, because I realized it’s value not just in helping students better comprehend passages, but in slowing students down and allowing themselves more think time to analyze and grow as readers.

This idea, which we call “4-square notes” in my classroom, may not be new, but I wanted to share how it evolved in my room to best fit the needs of my students. Below are the anchor charts I created for my class. 


Thoughts on Teaching Note-Taking:
-I spend a couple weeks teaching fiction note-taking before moving on to nonfiction.

-I always use the strategy with read-alouds first and go slow. We don’t start using this note-taking strategy with comprehension passages until we are weeks/months in. I want my students to see this for what it is, a great reading growth tool, not an easy way to pass a test.

-I usually spend a week modeling whole group and week with buddies/small groups before moving to a week of complete independence with the strategy (then after 3 weeks, I move to nonfiction).
(We only use these fancy note-taking sheets until the students memorize what should go in each square for fiction and nonfiction, then we just fold a piece of notebook paper into 4 sections.)

-Getting students to actually stop reading and jot down notes before returning to the passage takes a lot of practice. Many students don’t have that patience, they want to just finish reading and by the time they get to the end, they are unable to recall details/facts because they flew through with no self-monitoring.

-When teaching students to scan and chunk in fiction, I tell them that the beginning and end should be smaller sections and the middle should be the largest chunk.

-When teaching students to scan and chunk in nonfiction, I tell them that chunks can be one big paragraph, or a group of smaller paragraphs. We also focus on headings and sometimes chunk that way.

-I also make the anchor charts into a booklet that can be glues into their interactive notebooks for reference when needed and taken home to use as homework help.

-Students are basically writing mini-summaries when they stop to jot. I tell students that it doesn’t have to be in a complete sentence and that it shouldn’t be more than 1-2 sentences (some of my kiddos would write all day and spend more time doing that than reading). I also tell them that they cannot copy the author’s sentences or phrases, their brain has to create the retell.

This strategy pack is available in my TPT store.
-Whenever we have reading unit tests, the students receive two grades for the test score and one grade for their notes. This is great because the lazy/lucky learners have to slow down and apply more effort while the poor test-takers get credit for being able to read and comprehend.

Overall
This strategy worked really well for my students and made them better thinkers. As they got better at note-taking on their own, I noticed that our conversations about literature in whole group and small groups became deeper and more focused. I am not allowed to remind students to do note-taking or use any particular strategies on their end of year test so practicing this strategy until every student could/knew to do it independently really paid off.  

The only problem I did see is that some students had trouble differentiating a nonfiction passage from a fiction passage. They would follow all the right steps, but set up their paper for the wrong type of text, which would lead to confusion mid-way through the process. One thing I plan to do about that is focus more on differentiating between the two types of text. We always do surface fiction vs. nonfiction lessons and my kids can tell you the difference between the two. But, when faced with a 4-page passage with no pictures, they sometimes struggled. That’s why I created this Fiction vs.Nonfiction unit that I will be kicking off my year with. As soon as we finish this up, I will move into note-taking.


I hope this post has been helpful for someone out there. I was really pleased to be able to fine-tune a strategy that would help my kids feel successful on tests, but also help them grow as readers. The validation I received from both their test scores and DRA reading growth this year was outstanding and I had to share.
Thanks for stopping by!

Tuesday, July 21, 2015

Is it really an Interactive Notebook? Is it? ....Really?

Hey Y'all! Can we just jump into this thing today? I am super passionate about interactive notebooks and I have some opinions that might ruffle some feathers. I promise I'm not a hater, I just want to share my perspective.


First and foremost, I want to offer tips on how to make interactive notebook (INB) activities run smoother in your classroom. We all know that cutting + gluing + coloring + sorting + following multi-step directions can equal a HOT MESS in the classroom. But, there are many ways to keep the process smooth and focused on the content vs. the finished product of the "cute" activity or the mess.

*Disclaimer: I did a Periscope broadcast on this yesterday and I received such great interaction. My post was definitely enhanced by the participation of all the amazing teachers who watched!

Here's What:


Plan for Time: Be realistic about the amount of time it takes your kiddos to cut, sort, and glue. You don't want your lesson to be taken over by the logisitics of the activity.

For example: If you teach K-3, then multiple flaps on a page are NOT your friend. They look cute, but uh-uh! I have 8 year-olds and it would take them 8-10 minutes just to cut and glue 5+ individual flaps on a page. Nope. Ain't nobody got time for that!

Plan for Mastery: Your goal is for your students to obtain or show mastery of the concept, not create a cute notebook page. Keep that in mind when selecting activities. There are some super cute INB pages floating around on Pinterest, but I know for my classroom it would take way too long to assemble and the academic impact wouldn't match that time commitment.

Get the most bang for your buck!


This goes right along with planning for time. Anything you can do to save minutes during the lesson is GOLD! Some examples are:

-Pre-cut as much as you can before hand
(even if it's just cutting off the edges).

-Walk around and help your students during the cutting or gluing times
(you are assessing them on the content of the activity, not the cutting and gluing).

-Copy on color when possible, this will make directions go faster.
You can say, "Cut the pink piece" or "Glue the yellow piece at the top".


This is where the title comes in. If your students are not INTERACTING with the content, it is not an interactive notebook. If there is no action (hence: interACTive) other than writing, it is not an interactive notebook.

Does gluing in one piece and having students write answers equal an interactive notebook activity?....

No!

That doesn't mean the activity isn't of value or doesn't have a place. It just means that you probably shouldn't label it as an interactive notebook activity in your plans, or call it an interactive notebook when you sell it in your store, or buy it thinking you're getting something your students can hands-on interact with.

That's it.

I'm sure they'll still learn from it.


Yes, the students gain knowledge from simply doing the activity. But how much more powerful is it when they revisit their learning for reference.

The best thing is when a student starts to ask you a question and then stops themselves and says, "Nevermind, that's in my notebook!"

YES!

That is so powerful!

They learned it, they created it, they wrote it with their own hands, they remember doing it, and now they can refer to it. They just learned how to be a problem-solver and help themselves. That's a life skill people!

Granted, it does take many times of the teacher reminding them to check their notebooks when they ask questions, but they will get there.

Here are some quick ways to refer to the content:

-2-3 minutes at the beginning of the lesson to review specific pages with a buddy and then share out whole group about what you've been learning

-Send home for homework review and to share with parents (only if you are 100% sure you will get them back)

-Use as a time filler! Need to fill 3-4 minutes before lunch, have them pull out a notebook and interact!


**These tips have caused me to be so much more purposeful. In return, my lessons have run smoother and students have gained more value from our activities!

Let me know what you think!

Comment below or reach out at Adrienne@HavingClassinThird.com
(Yup, I'm a dot come now. YAY!)


Image Map

Wednesday, January 14, 2015

Multiplication Interactive Notebooks: Humpday Highlight

I love teaching multiplication and I love interactive notebooks. The teacher part of me leaps for joy every year when this unit comes up. It definitely helps that the students are even more excited for learning multiplication than I am for teaching it (if that's possible). I decided Mrs. Stanford's Humpday Highlight Linky would be the perfect time to show off our work so far.

Before I get started, I have to add a disclaimer that we are not done with our unit yet. My goal for interactive notebooks during this unit is to create a resource that students can refer to for help and examples, not necessarily creating cutsey-lots-of-cutting-involved-activities. I tell my students all year to look in their math notebook first when they have a question, but this is the first unit that they finally catch on. It's awesome to watch them become problem solvers.

Our county has us teach this unit in the same order every year: single-digit multiplication, division, and then double by single digit multiplication. Since, I have low ESL students, I always start with vocabulary. I have students glue the vocabulary sheet into their notebooks and then we color code each feature and word as I explain and describe the vocabulary to them. These pages are one of the most referred to throughout the unit by my students. After introducing and practicing the vocabulary, the students will complete the guided sort below.


Every day or couple of days, I introduce a new strategy and have the students glue in a pre-typed notes strip.  I have the students extend the lines in between the practice problems along the bottom of the strip and we solve these problems together as practice. I have found that students benefit from having pre-typed notes already in their notebook to refer to, along with guided practice. For multiplication and division, I teach: number line, repeated addition (or subtraction), array, area model, sets (equal groups). For double by single digit multiplication, I teach: Sets, Number Line, and Repeated Addition.


We also do property sorts. Our county focuses on Commutative and Identity Property of Multiplication for third graders.


We solve journal prompts a lot during this unit too. Students have to be familiar with every strategy because on our state tests, they will have to figure out the equation from a representation of the problem (number line, equal sets, repeated addition, etc.).


If you are interested in any of the activities in the pictures, you can check it out here. It also comes with some activities not pictured. I will be sure to come back and post more once we finish the unit.

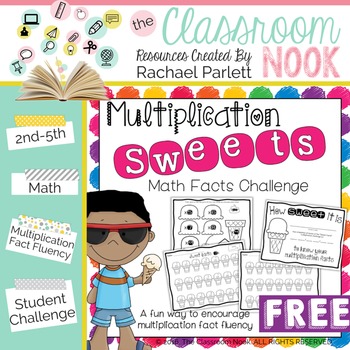
Ice Cream Multiplication is also a big part of my students learning their facts. I use this freebie, from Rachel Parlett, to quiz my students each Wednesday on their facts. If the pass, they advance to the next level and if they don't they repeat. It all leads up to a big ice cream party in June!


Wednesday, January 7, 2015

Division Cookies and Humpday Highlight

Today, we jumped into division and the kids had a blast! Equal sets is typically the first division strategy I teach, so I thought I'd kick it off with food. I started by reading The Doorbell Rang by Pat Hutchins. Have you ever read this book? It's super cute and a quick read. I remember reading this book when I was in elementary school. Basically, the mom makes 12 cookies for her son and daughter to share and they are happy because they each get 6. Then two more people come and they have to split the cookies by four, then six, and finally twelve.


After I read the book, I gave the students a recording booklet for our math interactive notebooks and a baggie with 24 pieces of store brand Cookie Crisp cereal. I told my students to take out twelve cookies from the bag and we worked through the booklet together, one row at a time, sorting our twelve cookies each time. Some students really struggled with this portion. They didn't understand (yet) how to figure out the number of groups to make.


When our booklets were done and the student had practiced with only twelve cookies, I had them take the remaining cookies out of their Baggie. I called out random division problems (with quotients less than 24) and had them sort their cookies to find the quotient. Eventually we eased into drawing circles with tallies instead of using the cookies and the students got to have their snack.

I will definitely be doing this lesson again next year, the students loved it and I really got to see who was struggling with the concepts. If you would like to try this activity with your students, just click on the pictures above for a free download. Let me know what you think!

http://mrsstanfordsclass.blogspot.com/2015/01/hump-day-highlight-numero-uno.html

Image Map

Wednesday, December 31, 2014

Top Five from 2014 and a SALE!

I love the idea of ending 2014 with a look back at my year in blogging. It was been a rough road for me trying to juggle school, home, mommy-duties, church, and creating products along with blogging; which is why I was absent for a lot of 2014. I think that I'm finally getting into the swing of things and I am excited for the road that lies ahead. My goal for 2015 is to blog once a week and connect to at least one of blogger through commenting or some other form of social media once a day.

I decided to let you all be the judge of which posts made it into my top five. I was actually shocked to see the page views that some of my posts have accumulated since I first published them. These were definitely not the five I had in mind when I first came across Jivey's Top Five Linky. Before I get into the list, I just want to say thank you. Teachers are really the best. You all have been a great support and source of inspiration this year, both through conversation and through the opening of your classroom. I appreciate you all.

Now...Let's Roll


Also, Don't miss the New Years SALE happening in my TPT store right now! Just click the TPT button below!

See you next year!
Image Map

Sunday, December 21, 2014

Synthesis Interactive Notebook

I have been using interactive notebooks for everything these days and the kids and I are loving it! The new buzz word in my classroom is "pizazz"! One day, a student said that I always add pizazz to my notebook pages by coloring and writing neatly and now they have pizazz contests every time we work in our notebook. I don't think I've ever had a class that loves notebooking more than me, I have been on cloud nine!

I started the lesson by asking my third graders what they knew about synthesis. Some students had good guesses relating to photosynthesis, but no one knew what I was getting at. We have been talking a lot lately about “thinking about our thinking” and I told them synthesis was one way to do that. I brought in Russian nesting dolls and held the stacked dolls up. I asked if any students had ever seen them before and only a couple had. I told the students that the doll represented their thinking after they were done reading. Then, I opened up the doll and started unstacking the smaller dolls. The kids got SO excited, by the time I looked back up, they had all inched at least 2 feet closer! I held up the smallest doll and told the students that it represented their thinking at the beginning of reading a book, small. They don’t know much about the book yet and they can only connect to that little bit they know. Then I held up each doll as explained that as they read, they learn more, they can connect to more, their thinking gets bigger, and their ideas grow. They totally got this! I had them glue a title notes strip to a blank page in their reading notebook and we highlighted key words (this can be found here, if your are interested).


Next, I told the kiddos that we were going to practice synthesis together and I pulled out The Littlest Matryoshka by Corinne Demas Bliss. The students really enjoyed this book. I created paper stacking dolls for students to glue into their notebook as a flipbook. We stopped after the first page, dicussed/filled out the smallest doll, and glued it in the middle of the notebook page.Throughout the book, we stopped, discussed, and added pages to our doll flipbook. Each time, I reminded the students that their thinking was getting bigger, so the doll was getting bigger. 


After the book, when our flipbook was completely assembled, we wrote on the first page underneath the title strip. I had my students start their paragraph by telling me what synthesis was and then add their sentences from the dolls as their detail sentences. They were asked to make their closing sentence a feeling, thought, or opinion of the book. This lesson took 3 days to complete, but the students were engaged every day. After the first day, I had a group of pulled students re-enter the room and the rest of the kids immediately started telling them what synthesis was, what the dolls looked like, and how the two fit together. It was awesome!

Below are some pictures of our learning:


(The anchor below we used with the book Emma Kate by Patricia Polacco.)


I still have a week or more of teaching synthesis after we return from winter break and I would love any ideas you have! Thanks for stopping by!

Thursday, December 4, 2014

Historical Fiction

I have been teaching third for four years (five if you count my graduate internship) and I have never explicitly taught historical fiction. Sure, I covered it as a part of genre, but that was it. Our county recently adopted a new program, Benchmark Literacy, which definitely has it's ups and downs. The program has us spending 2 weeks on historical fiction, and I have to say that I have loved it. Here's what we've been up to:

First I introduced historical fiction with the definition on my anchor. Since I like "well-put-together-looking" anchor charts, but don't have tons of time in my classroom before or after school to create them, I typed up the headers I wanted for my chart and just glued them on. If you're interested, you can find them here.
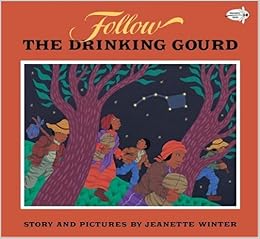
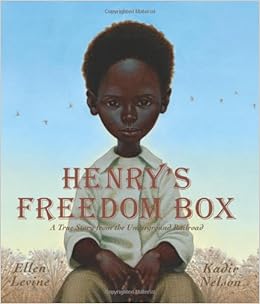
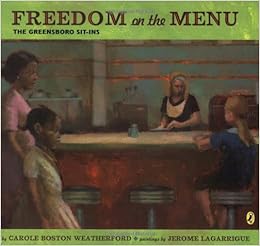
Next, we made connections by finding historical fiction picture books in my classroom library and discussing ones that they have already read. We found:


Then, we read one of my favorite historical fiction books, The President and Mom's Apple Pie by Michael Garland. It is about President Taft visiting a town for a flag pole ceremony and going on a hunt for the scrumptious food he smells. There is even a paragraph inside the front cover that tells about President Taft, which was helpful when we were separated fact from fiction.

We added to our anchor chart as we read.


Then, the students glued a historical fiction foldable into their reading notebook (you can also find that here) and copied from our anchor chart. We put nonfiction elements behind the flap and fiction on the notebook paper. When they were done, they had to add at least one fact to each category on their own and respond to the prompt strip glued into their notebook.


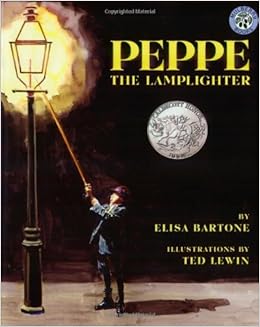
Peppe the Lamplighter by Elisa Bartone is a historical fiction book I just found. I plan on reading it to my students next week. It is a great story with amazing paintings/illustrations, but will take some discussion beforehand. I'm thinking I will have to discuss the concept of "Little Italy",  mention that some religions light candles for prayers, and briefly describe the flow of immigrants in 20th century New York.

I also have the historical fiction poster from my free genre poster pack on display!


Please let me know what books or activities you do while teaching historical fiction. Don't forget to swing by for my 1,000 follower freebie! See you soon!